I absolutely LOVE this recipe because I am a sweets girl and a chocolate girl especially so this muffin recipe basically came about to help satiate both those desires. I found the starter for this recipe in the Fixate cookbook by Autumn Calabrese, and then modified it to fit not only my taste, but my lifestyle. The original recipe is delicious and I've made it several times for myself and for clients, but I find this helps me really work through the sweet cravings more than the original recipe.
Chocolate Banana Muffins
Ingredients:
2 large eggs, lightly beaten 2 medium bananas, ripe and mashed 1 tbsp. extra-virgin coconut oil, melted 1 cup almond flour 1/2 cup cocoa powder, unsweetened 3/4 tsp. baking soda 1 dash sea salt 1/2 cup or 1 container apple sauce, unsweetened
Directions:
1. Preheat over to 350 degrees F. Prepare 9 muffin tins by lining with muffin tin liners or coating with non-stick spray. (I've tried liners and personally have found that any healthy muffin always sticks to the liner so I always forgo them, use spray and put them directly in the cups).
2. Combine eggs, banana, apple sauce, and coconut oil in a medium bowl and mix well. Set aside.
3. Combine almond flour, cocoa powder, baking soda, and salt in a medium bowl; mix well.
4. Add almond meal mixture to egg mixture; mix until blended.
5. Divide batter evenly between prepared muffin cups.
6. Bake 16-18 minutes, or until a toothpick inserted into the center comes out clean. Transfer to a rack and cool.
Notes: I use a Kitchen Aid when I make these which really speeds up the process. I also just slice the bananas quickly, and if they're ripe enough they should just mash when you mix them with the eggs and apple sauce. I do sometimes add a little cinnamon if I feel like it, and like to leave the bananas with some texture within the muffin as you can see in the close up picture. As long as you use gluten-free ingredients this is an AWESOME recipe for those with a celiac allergy.
Honestly, I had to keep myself from eating more than one a day because they are so tasty, but I would HIGHLY recommend placing these in the fridge because the ingredients are perishable, and if you're not going to eat them over the week, freeze half of them and take them out of the freezer when you want to phase them back into your meal plan. I've tragically had some go bad before and had to throw them away (the only downside to using good, fresh ingredients).
I hope you enjoy these as much as we do in my house. They're so tasty that even my not-so-healthy boyfriend packs them in his lunchbox!
This is one of my favorite recipes when I'm having guests stay over for a night, or want to prep something for breakfast that will make it through part of the week. Anyone who knows me knows I'm a lover or ricotta even in my breakfast food! I cut this into 8 pieces, 2 pieces per serving. You can see that you may also use the macro count from the 21-Day Fix programs in order to track your intake as opposed to counting your calories. I hope you enjoy this one as much as I do!
(Makes 4 Servings)
INGREDIENTS:
10 oz. Turkey Sausage (about 3
sausages), casings removed
1 ½ cups Broccoli Florets,
chopped
½ Red Bell Pepper, diced
2 Green Onions, thinly sliced
6 Egg Whites
2 Eggs
½ cup Low-fat Ricotta Cheese
½ cup grated Low-fat Cheddar
Cheese
DIRECTIONS:
1. Heat a 9- or 10-inch ovenproof,
stick-resistant (or seasoned) skillet on medium-high; mist with
non-stick cooking spray. Add sausage, broccoli, pepper and onions and
cook, breaking up sausage with a wooden spoon, until sausage is
crumbled and no longer pink; about 3 minutes.
2. Meanwhile, in a medium bowl, whisk
egg whites, eggs and ricotta until foamy and just a few lumps remain.
Pour over top of sausage mixture; cover, reduce heat to medium and
cook until bottom and sides are firm and top is almost set, about 7
minutes.
3. Preheat broiler to high. Uncover
skillet and sprinkle cheddar over top of egg mixture. Broil until
center is set and cheddar is melted and bubbly; 2-3 minutes.
One of the most frequent statements I get from clients and customers when discussing recipes and nutrition is that there aren't enough simple Crock Pot recipes. They're easier to prep, require no hands on cooking time, and they're almost always super flavorful. This recipe came into my food world because I was building a meal plan for a client with a full time job, two kids, and a household to keep running. She needed something time efficient, tasty, and easy to clean up. The bonus with this recipe, is that you not only get oats in your diet (a super food), but you can top it with whatever works in your diet (almonds, dark chocolate, fresh fruit, dried fruit, etc.). The apple simply melts into your oatmeal for a natural sweetness with your stevia, and the prep time is less than five minutes. Enjoy!
Oatmeal
Crock Pot Bake
(4
Servings, 1 cup)
Ingredients:
1
cup gluten-free steel cut oats
2
cups unsweetened vanilla almond milk
2
cups water
1
large honey crisp apple
4
packets Stevia
1
tbsp. Coconut oil
1 tbsp. Cinnamon
pinch
of sea
Directions:
You
may want to spray or coat the inside of your crock pot with oil or
butter to avoid oatmeal from caking to the sides. I didn't do this
step and didn't have any issues but every crock pot is different.
Measure
and pour 2 cups of water and 2 cups of almond milk into the crock
pot. Add 1 tablespoon of melted coconut oil and stir.
Next,
core and chop one large apple into small bite size chunks. I left my
skin on but again this is optional.
Add
chopped apple, a pinch of salt, gluten-free steel cut oats, honey,
and cinnamon. Stir a few times.
Place
lid securely on your crock pot and let your apple cinnamon oatmeal
cook on low for 7-8 hours.
I truly believe that eating healthy doesn't mean having to sacrifice all the flavor in your diet, especially snacks that are sweet and tasty. This quickly became one of the favorites in a Clean Eating Challenge Group I was running, and I've even had people tell me they doubled the batch and made pies with it. Again, this has macronutrient counts for those people who are following the 21-Day Fix containers, or using macro counts as a way to control portions and caloric intake. When I put this on a meal plan, I had miscalculated the proper measurement for the peanut butter, so I adjusted it here for the appropriate count, and it's still just as tasty as it was with the over measured peanut butter in the original recipe. If you're looking for something to satiate that sweet tooth, or fill the void of your Hershey's Kisses, this one is for you!
CHOCOLATE TOFU MOUSSE
1 Protein, 2 Nut Butter
(Makes 4 Servings)
INGREDIENTS:
1 (16 oz.) pkg. Silken Tofu
2 tbsp. Almond Milk, more for desired texture
1 tsp. Vanilla Extract
1/8 c.+ 2 tsp. Natural Peanut Butter
4 tbsp. Cocoa Powder
3 Stevia Packets
DIRECTIONS:
1. Place all ingredients in a blender or food processor and blend until smooth. Add additional almond milk one teaspoon at a time if it is too thick. Taste the final product to make sure it is sweet enough for your liking, and add additional Stevia if you prefer it sweeter. Divide into four ramekins or cups and refrigerate for a minimum of 30 minutes. Enjoy by itself, or topped with fresh fruit.
Again, this is an awesome way to get some protein in while also satisfying that need for sweets and chocolate, not to mention that peanut butter is so good for you in so many ways. I hope you enjoy this as much as my challengers do, and feel free to share it with other 21-Day Fixers and health foodies alike!
A traditional shepherd's pie is made with lamb or beef, as well as corn and potatoes, with additional ingredients depending on what recipe you consider a "real" shepherd's pie. When I look over those traditional recipes, they often lack enough veggies and are pumped full of carbohydrates. In order to reach the right sized portion, with the appropriate amount of macronutrients, I took the traditional recipes, limited the carbs, and increased the vegetables. This cleaner shepherd's pie may be quite different from the recipe that your mother made, however I know that once you give this a try you will understand eliminating the extra fat and carbohydrates, doesn't mean you also eliminate the flavor. And, if you're someone who is looking for new recipes to add to your 21-Day Fix meal preparation rotation, I list your servings and macronutrient counts so you can easily track your meal.
Shepherd’s
Pie
1
Protein, 1 Veggie, 1 Carb
(Makes 6 servings)
INGREDIENTS:
3 cups Sweet Potatoes, peeled,
cubed and steamed
1 tsp. Garlic, minced
Salt and Pepper to taste
2 tsp. EV Olive Oil
1 ½ lbs. Lean Ground Turkey
1 medium Yellow Onion, diced
1 cup Peas, frozen – defrosted
½ Summer Squash, sliced into ¼
slices
½ Zucchini, sliced into ¼ inch
slices
½ cup Mushrooms, sliced
½ cup Carrots, sliced
1 rib Celery, sliced
½ tsp. Garlic Powder
½ tsp. Onion Powder
DIRECTIONS:
1. Preheat oven to 375 degrees F. Steam sweet potatoes until soft, or a fork pierces through easily and place in
food processor. Add garlic powder, onion powder, pepper to taste, and puree until
smooth. Put aside.
2. Heat 1 tsp. EVOO in large nonstick
skillet over medium-high heat. Add ground turkey, salt and pepper to
taste, and stir often to break up meat. Cook until no pink remains,
about 8 minutes. Drain and discard fat; set turkey aside.
3. In same pan, heat remaining 1 tsp.
EVOO on medium-high heat. Add onion, summer squash, zucchini,
mushrooms, carrots, celery, salt and pepper to taste, and cook, stirring occasionally,
until veggies are soft; about 8 minutes.
4. Add turkey back to pan, and stir
into vegetables. Add peas. Transfer mixture into a 13 x 9 in. baking dish and
cover with whipped sweet potato, spreading out over entire mixture.
Bake in oven for 30 minutes.
You may find that this is a bit different in texture from your traditional recipes, but the flavor is great. It's also packed full of veggies, proteins, and the proper amount of carbohydrates per serving. I hope you enjoy your cleaner version, and always remember that you can substitute different veggies per your preference. If you don't like mushrooms, substitute a veggie you do like. There's no sense in eating foods that you don't enjoy!
The Mixed Berry Baked Breakfast Cobbler is one of my all time favorite breakfast bulk recipes because in a lot of ways it's almost like dessert for breakfast. Over the last year I have coordinated a lot of Challenge Groups around Clean Eating in combination with the 21-Day Fix portion control macronutrient counts in mind. This has led to a lot of research on Clean Eating recipes, and how to modify their ingredients to appropriately meet particular macro counts with each serving. I came across the idea for this recipe from The Eat Clean Diet Cookbook, but totally revamped it so it could be applied to the 21-Day Fix portion control plan.
This meal is a great way to start breakfast, for several different reasons. First off, it has carbs, fruits, and proteins, which means that your going to feel satiated longer, have sustained energy over time, and you'll reach a large amount of marcros in one swoop. Secondly, this recipe is on the sweet side, so if you're someone who misses sweets while you're trying to eat clean, this recipe will help you satisfy some of those cravings.
Mixed
Berry Baked Breakfast Cobbler
1
Protein, 1 Fruit, 1 Carb, 1 Seed
(Makes 4 Servings)
INGREDIENTS:
1 cup Old Fashioned Oats
1 cup 1% Milk
½ tsp. Vanilla Extract
1/2 cup Slivered Almonds
1 ½ cup Fresh Strawberries,
sliced
1 ½ cup Fresh Blueberries
1 large MacIntosh Apple, unpeeled,
grated
4 packets Stevia
DIRECTIONS:
1. Preheat oven to 400 degrees F. Coat
a 9 x 9 baking dish with non-stick spray.
2. Combine all ingredients in a large
bowl. If you are preparing this the night before, don’t add the
liquid ingredients such as milk and grated apple until the morning.
3. Place mixture in baking dish and
bake uncovered for 45 minutes.
GREEK YOGURT TOPPING
(1 Serving)
¾ cup Plain Fat-Free
Greek Yogurt
½ tsp. Cinnamon
1 packet Stevia
Mix all ingredients
together and top cobbler with your yogurt mix.
A few things to note about this recipe; if you're someone who prefers to use agave, maple syrup, or cane sugar, you're more than welcome to. I would suggest using about 2 tablespoons of any of those in place of the Stevia. Also, you can control how sweet you want the recipe. I'm someone who really enjoys sweet food, so I put 1 Stevia per serving of oatmeal, as well as the yogurt topping, but feel free to decrease the sweetener to your taste. Lastly, the Greek Yogurt Topping recipe is for one serving, so if you want to bulk it in order to have enough for each serving, you need to quadruple the recipe. I prefer to make it fresh every time I heat up the oatmeal bake, but if you're more successful being totally prepped, you should just plan on making enough for each serving of oatmeal bake. I feel like this is an amazing recipe, so I hope you enjoy it as much as I do!
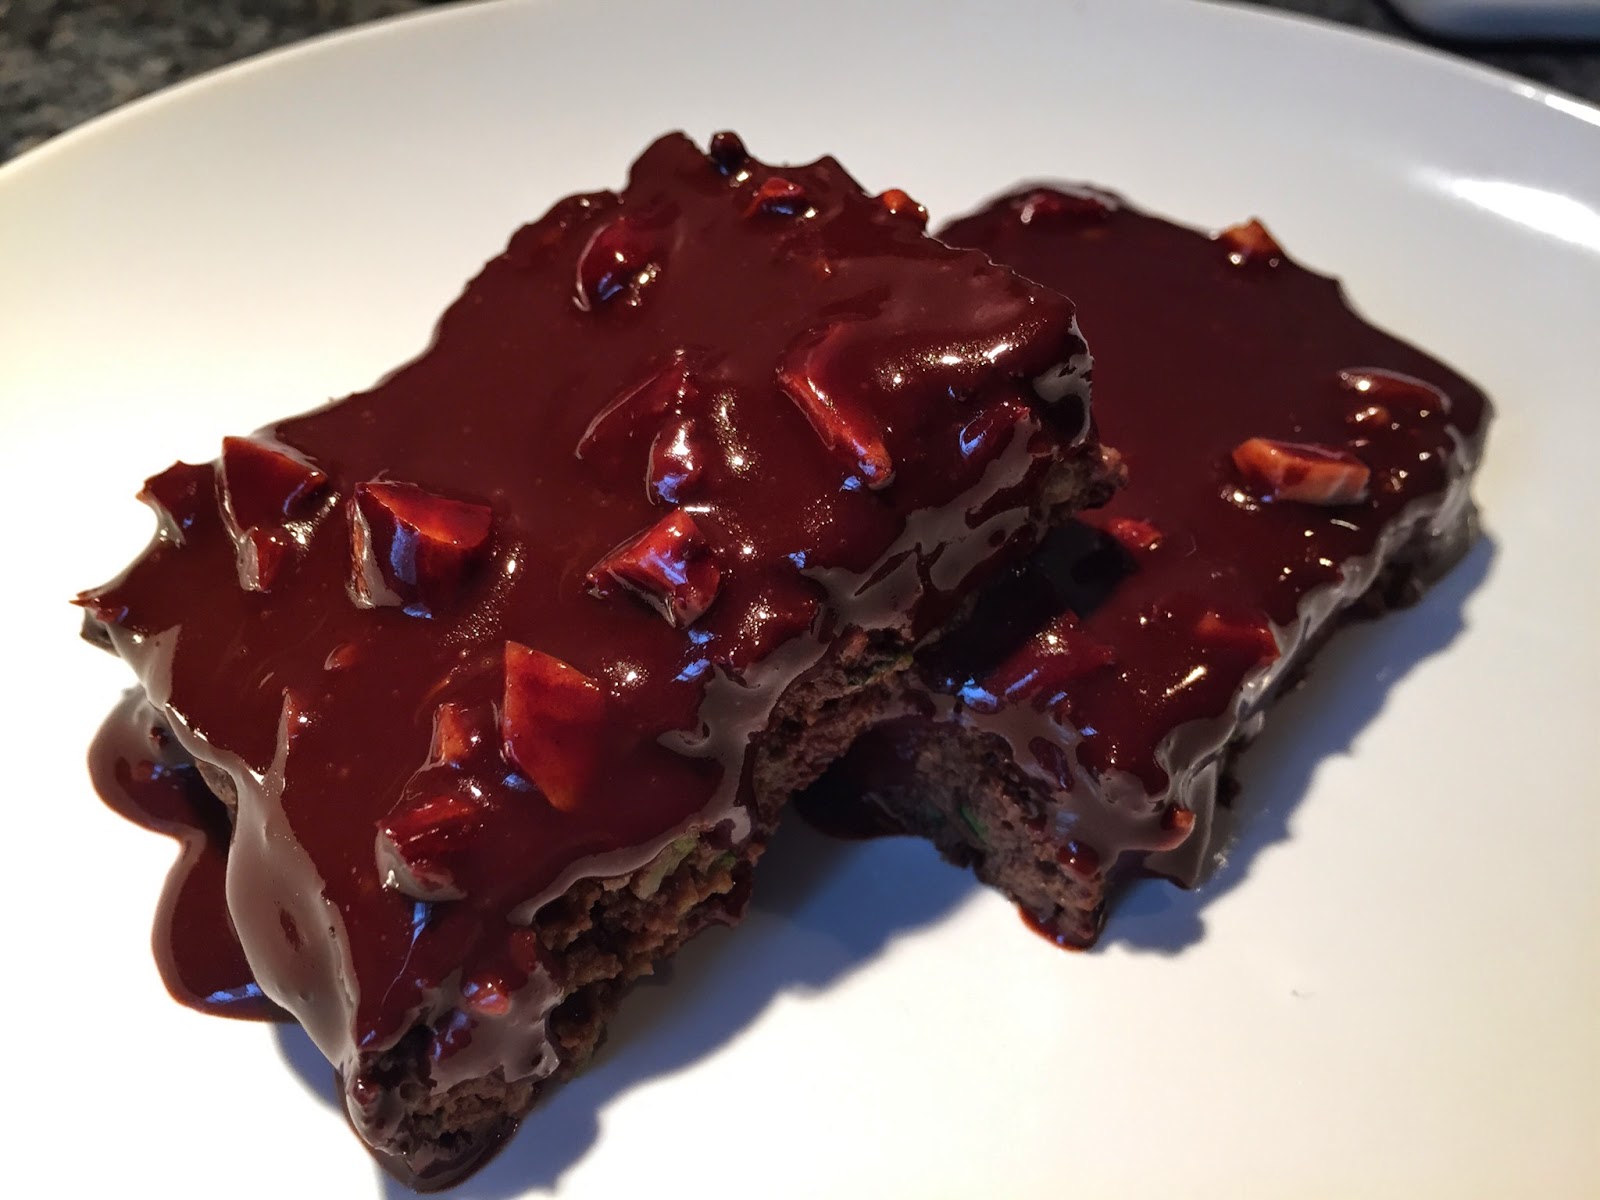
We all know that you can still over eat when you're eating clean. Although I acknowledge this entirely, I also realize that when we have a sweet craving, it's going to need to be satiated, with either something good, or something bad. So let's discuss here, the something good. I was inspired by an Instagram post by @drcharo that was a zucchini brownie with frosting, and man did it look delicious. My versions didn't come out quite as thick as hers, as I chose to use maple syrup as a sweetener rather than a stevia or coconut sugar blend, but they were super delicious all the same. I will admit here that I certainly licked the spoon more times than I should have, and this probably led to some extra calories I didn't need. Hey! At least it was all natural sugars!!!
INGREDIENTS: Brownies:
- 1/2 cup Almond or Peanut Butter
- 1 whole Egg and 3 Egg Whites
- 1 tbsp. Baking Powder
- 1/4 cup Unsweetened Cocoa Powder
- 2 cups Shredded Zucchini
- 1/2 cup Maple Syrup
Frosting:
- 1/4 cup Coconut Oil
- 1/4 cup Unsweetened Vanilla Almond Milk
- 1/4 cup Unsweetened Cocoa Powder
- 1/4 cup Honey
- 1/4 cup Chopped Almonds
DIRECTIONS:
1. Preheat oven to 350 degrees F.
2. Combine peanut butter (or almond if that's what you chose), eggs, cocoa powder, baking powder, zucchini and maple syrup in bowl, and beat on medium speed until well combined. If you choose to use a powdered sweetener the batter will be on the thick side. If you used maple syrup, it will definitely be thinner in consistency.
3. Place batter into 13 x 9 greased (or parchment lined) pan. Spread the mixture around to make it even throughout the pan.
4. Place in over at 350 for 25-30 minutes, or until center is cooked through. Remove from the oven and let cool.
5. While the brownies are cooling, put coconut oil, almond milk, and cocoa powder in a microwave safe bowl. Place in microwave and cook for 1-2 minutes, or until coconut oil is melted. Remove from microwave and add the honey to the bowl. Whisk well, until all ingredients are combined. Add chopped almonds and mix well.
6. When brownies have completely cooled, pour frosting over the top and allow to set.
7. Enjoy!
All of these ingredients are all whole, there is no refined flour and every sweetener is natural. This is not to say that they do not contain a decent amount of sugar, but as long as you don't overindulge, you're getting your sweets fix and getting awesome super foods like coconut oil, zucchini, peanut butter and cocoa. Dr. Charo's recipe has a little less sugar than mine, but she claims that her version has 89 calories, 8g of fat, 3g of carbs and 6 g of protein per brownie with 15 total brownies. I cut mine into 18, and didn't factor in the additional sugar here, but it's certainly not a lot higher than what she posts (as long as you don't eat the whole pan).
I'm not going to lie, the part of me that's Italian feels a little guilty about taking the meatball and turning it clean, but I got this recipe from when I did 21-Day Fix Extreme, and they are honestly very good. This is a great way to substitute bread crumbs with oatmeal, and red meat for ground turkey. Just remember that meatballs do not make an entire meal, so pair it with some whole grain pasta, or some veggies, or both, but make sure you make it a meal! (And Dad, if you read this, don't be upset that I turned the meatball into a health food...please???)
Ingredients:
- 1 1/2 lbs. 93% lean ground turkey
- 1 tsp. Sea salt or Hymalayan salt
- 1 tsp. dry mustard
- 1 tsp. smoked paprika
- 1 large egg, lightly beaten
- 3/4 c. quick-cooking rolled oats
- 2 cloves garlic, finely chopped
- 12 fresh parsley sprigs, finely chopped
- 2 tbsp. tomato sauce, no sugar added
Directions:
1. Preheat oven to 400 degrees F.
2. Line large baking sheet with parchment paper, or lightly coat with non-stick spray.
3. Combine turkey, salt, mustard, smoke paprika, egg, oats, garlic, parsley and tomato sauce in a large bowl, and mix well. (I used a Kitchen Aid mixer, but you can mix by hand.)
4. Roll mixture into 30 1-inch meatballs. Place on prepared baking sheet.
5. Bake for 15-20 minutes, or until no longer pink in the middle.
Makes 6 servings, 5 meatballs each.
The great part about these meatballs is that you can freeze them, and then defrost and reheat them whenever you want, so you're not committed to eating meatballs three days in a row. Just remember that if you're pairing these with pasta, you should really only be eating about three servings of carbs per day, around 1/2 cup serving, so don't throw them on top of half a box of pasta and think you're eating healthy. Portion control, and meal planning are the key to success, so make sure you're aware of what you're putting in your mouth, and also try to get your carbs in early in your day so you have time to burn them.
If you have any questions or comments please contact me at:
I love lasagna, but the classic lasagna is typically weighed down with whole-fat cheeses, and is very rarely portion controlled. I stole this from the Clean Eating Mag site, and what I love about this recipe, outside of the taste, is that it allows you to easily portion control your meals, and helps fill that craving for pasta and cheese. I come back to this recipe time and time again, sometimes using ground bison, and sometimes using turkey. Each will create a different texture and flavor, but they are equally delicious.
When it comes to whole foods, and clean foods, I always tell people that you need to know what you're willing to compromise in your diet. I use low-fat and fat-free cheeses, however, other clean eaters would argue that these are over processed and not a healthy solution. You have to be your own gauge when it comes to what you put in your diet, and what you choose to leave out. If you prefer whole-fat, you can still make this recipe, it will just clearly have a higher fat content.
Ingredients:
- 8 Whole Wheat Lasagna sheets (cooked to pkg. directions)
- 1 15 oz. pkg. Low-fat Ricotta
- 1 pkg. Frozen Spinach, thawed and drained
- 1 Egg
- 3/4 c. Low-fat Shredded Mozzarella, divided
- 2 tbs. Fresh Basil (chopped)
- 1 tsp. Extra Virgin Olive Oil
- 1 small Onion, chopped
- 1 clove Garlic, chopped
- 1 lb. Ground Bison
- 1 28 oz. can Whole Tomatoes
- 1 tbsp. Smoked Paprika
- 1 tsp. Garlic Powder
- 1 tsp. Cumin
- Salt and Pepper to taste
Directions:
1. In a skillet or saute pan, heat EVOO on medium. Add onions, lightly salt, and cooked for 3 minutes. Add garlic, and cook for additional 2 minutes.
2. Add bison, salt, pepper, smoked paprika, garlic powder, and cumin to bison and break up meat, cooking until very little pink is left.
3. Add whole tomatoes to pan, cover, and allow ingredients to simmer on low for 25 minutes, occasionally stirring in order to break up tomatoes.
4. While the meat sauce is cooking, cook lasagna noodles to package directions. In a medium bowl, combine egg, ricotta, fresh basic, salt, pepper, spinach (squeezed of all excess fluid), and 1/4 cup mozzarella and mix well.
5. Preheat the oven to 400 degrees F. Spread 1 cup of cooked tomato sauce into the bottom of a 9 x 10-inch casserole dish. Lay a cooked lasagna noodle flat in front of you. Use a spoon to spread 1/8 of the ricotta mixture across the noodle, and roll it up. Place the rolled pasta seam side down, into the casserole dish. Repeat with the remaining noodles. Spread the remaining tomato sauce over the roll-ups, then top with the remaining 1/2 cup of mozzarella.
6. Bake, covered with foil, for 20 minutes. Remove foil and broil for 5 minutes or until roll-ups are browned and bubbly.
If you find that you are someone who doesn't know how to eat lasagna without overeating, you'll greatly appreciate how each roll-up is an individual serving running around 234 calories (this is not a solid number as it will change depending on what type of meat you use). And like any pasta, the next day leftovers taste almost better than the fresh out of the oven product. So, good luck and enjoy!
As I return to writing my Clean Eating blog, there seems like there is so much to catch up on, I don't know where to start. So, I'll start with stating the obvious: when spring hits in New England, there is nothing I want to do more with my food, than throw it on the grill! My father would say that grilling is a year round event, and he'll snow blow around his Weber in mid-January to make sure that chicken wings are served at a family gathering.
That being said, I'm not a snowshoe girl, and I rarely make an appearance in front of my grill until the trees start budding, and the birds start chirping...sorry dad! So, when I was staring at the pork tenderloin that sat lonely in my fridge, I needed to decide what kind of sides I wanted to prepare with it, and I immediately went to the guru of grilling himself (no not my dad, although he'll argue otherwise), Bobby Flay.
I have referenced his Grilling for Life book before, and I went straight to this book again to choose which starch would accompany my grilled pork tenderloin. This day, I chose the Grilled New Potatoes with Lemon-Garlic Aioli and Chives. Although aiolis typically are high in fat because of the mayonnaise, it's important to remember to choose an olive oil based mayo, and to substitute part of the measurement with plain non-fat Greek yogurt. Although it can be a little tart, the texture remains the same, and very little change occurs in the delicious taste.
Grilled New Potatoes with Lemon-Garlic Aioli and Chives Serves 6
Ingredients:
3 lbs. small New Potatoes, unpeeeled
1/2 c. olive oil based Mayonnaise
1/4 c. plain non-fat Greek yogurt
1/4 c. fresh lemon juice
2 tsp. grated lemon zest
1/2 tsp. Kosher salt
1/2 tsp. black pepper, freshly ground
3 tbsp. olive oil
1/4 c. chives, finely chopped
Directions:
1. In a large pot of salted water, boil the potatoes until just cooked through but not completely soft, 10-15 minutes depending on size. Test by piercing a potato with a thin bamboo skewer; when the skewer meets some resistance but can slide all the way through, the potatoes are ready. Drain the potatoes and set aside until cool enough to handle.
2. Combine the mayo, Greek yogurt, garlic, lemon juice, zest, 1/4 tsp. of salt and pepper each, and place in a blender and blend until smooth.
3. Heat your grill to high.
4. Cut the potatoes in half, brush the cut sides with olive oil, and season with the remaining salt and pepper. Grill the potatoes cut side down until golden brown and just cooked through, 2-3 minutes.
5. Place the potatoes on a platter, drizzle with the aioli, and sprinkle with the chives. Serve warm.
Comments:
I absolutely LOVED this dish! I am a huge fan of citrus, especially when it's not overpowering. The lemon-garlic aioli adds a nice, light flavor to the dish, and brings a new characteristic to these starchy potatoes. The pictures that you see above are not a serving for six, so don't be surprised when you make this dish and it seems like you have a ton of potatoes. The full recipe is a great idea for cookouts, where you'll have more than a few guests over to enjoy your lighter, cleaner version of a potato salad.
I also chose to toss my potatoes in the aioli itself, rather than just drizzling the sauce on top. I did this to ensure even coverage, and because I wanted to avoid having one potato with a ton of flavor, and one that barely had any. This is a great example of how you can modify whatever recipe you're making to tailor your food preferences. Appearance wise, placing the potatoes on a platter, drizzling them with aioli, and then topping them with sprinkled chives, I'm sure looks beautiful and amazing. However, you can make the choice as to how you would like to present your fancy potato salad to your arriving guests.
I had a friend ask me on Facebook if I could share this recipe with her, and I automatically sent her here to my blog, and told her to search under 'turkey' or 'chili'. Well, turns out, despite the fact that I've made this dozens of times, brought it to Chili Cookoffs, family cookouts, and football games, I somehow have never managed to get it blogged. WEIRD! Especially since this is one of my favorite dishes to cook, and one of my favorite fall dishes to eat.
Again this recipe was based off of something I came across on The Eat Clean Diet website, however I never truly followed the recipe, and it's definitely changed and evolved almost every single time that I've made a batch. I always start with this base recipe that I'm providing here, and then depending on the occasion, or who I am feeding, I might spice it up, or change the toppings to suit the crowd. What I particularly LOVE about this recipe is that it makes about 8 servings, so it's great to batch for a week, and it really only takes about 20 minutes of working prep time. Super easy, suuuupppeeerrr yummy!
Ingredients:
- 1 medium yellow onion, diced
- 2 cloves of garlic, finely chopped
- 1 stalk of celery, diced
- 1 jalapeno pepper, diced (with seeds if you want spice)
- 1 habenero, diced (with seeds for EXTRA heat, or leave this out entirely if you don't want it super spice)
- 1 tbsp. extra-virgin Olive oil
- 1 lb. lean ground turkey
- 1 15 oz. can Red Kidney beans
- 1 15 oz. can Pinto beans
- 1 15 oz. can Black bleans
- 1 1/2 cups low-sodium chicken stock
- 1 1/2 cups tomato puree
- 1 tbsp. tomato paste
- Salt and Pepper to taste
-1 tsp. smoked Paprika
- 1 tsp. cumin
- 1 tsp. Red Pepper flakes
- 1/4 cup shredded low-fat Cheddar cheese, divided
- 1/2 cup non-fat Greek yogurt, divided
Directions: FOOD PREP:
1. Dice yellow onion, celery, jalapeno pepper, habenero pepper, and chop garlic. Keep all ingredients separate.
2. Rinse Red Kidney, Pinto, and Black beans and let drain until needed. COOKING:
3. Heat olive oil in 4-quart pot. Add onion and garlic, and cook until translucent, about 4 minutes.
4. Add celery, jalabeno, and habenero pepper to pot. Cook additional 4 minutes.
5. Add ground turkey, salt, pepper, smoke Paprika, cumin, and Red Pepper flakes to pot. Mix spices in, and break up ground turkey. Cook until almost all pieces are browned through, about 5-7 minutes.
6. Add tomato paste, tomato puree, chicken stock, and all three types of beans to pot. Stir.
7. Bring to a boil, reduce to a simmer, and let simmer for 45 minutes.
8. Top each serving with a tablespoon of Greek yogurt and low-fat Cheddar cheese.
A couple things to discuss in preparing this dish. If you like it spicy, keep all of your pepper seeds in, but be aware that when you're cutting peppers, the oils will linger on your hands if you don't make sure to wash them very well. Therefore, every cut, hang nail, or cracked part of your hand will burn for hours if you're not careful with how you prep them.
Also, I put a separate section for 'food prep' because it is getting everything diced up and ready to go that makes this dish feel super easy to execute. If you're trying to dice while cooking other ingredients, you'll feel like you running around your kitchen like a madman. Do youself the favor, dice everything first, rinse your beans, and open all your cans. You'll be shocked at how fast and easy this dish is when all you have to do is keep adding ingredients to the pot, and stirring.
This is an AWESOME fall dish, and no matter where I bring it, people are usually shocked that it's a healthy dish, because it tastes better than the average beef chili, and doesn't sit quite as heavy in your body. If you're going to pick just one dish to try on this blog, honestly, this would be the one I suggest. ENJOY!!
What I'm about to tell you, might shock you...I LOVE PASTA!!! In any form, with any cheese, I'm pretty much sold on most pasta dishes. The biggest problem that I run into with pasta recipes, both at home, and when I dine out, is that no red sauce is EVER comparable to my father's sauce, so I rarely attempt to make, or order it for dinner.
What initially drew my attention to this dish was that the sauce was not a typical red sauce, and also that with my recent withdrawal from most dishes with chicken, I am forced to start looking for new ways to prepare this protein. As with most people who eat clean, when you're limited to certain lean proteins, at some point you start to get bored with the way you habitually cook a particular protein. I was reaching the point that I had about as much desire to eat chicken, as I did to lick a cardboard box. Sooooo...time to switch it up.
This recipe started as a by-the-book dish, meaning I was't planning on altering it at all. But, as I started to really prepare the dish, I realized that it was supposed to be served room temperature, the sauce wasn't hot, and the yellow pepper was tossed raw. Ummm...NOPE! I'm like a 90 year old woman. I need my food so hot that I can barely stand to eat it, and so I took this recipe from The Best of Clean Eating 3, and modified it to how I wanted it to be built. AND...IT WAS AMAZING!!!
Red Pepper Sauce:
- 1 red bell pepper, coarsely chopped
- 1/2 sun-dried tomatoes, coarsely chopped
- 2 tomatoes, coarsely chopped
- 1/4 cup unsalted raw cashews
- 1/4 cup whole fresh basil leaves
- 1 garlic clove
- fresh ground pepper to taste
- 3 oz. shredded Romano cheese, divided evenly
Instructions:
1. Preheat saute pan with chicken stock to medium-high.
2. Prep chicken breast with a thin coating of olive oil (1 tsp.), black pepper, and seasoning of choice. Cook chicken in preheated pan for about 7 minutes per side, until juices run clear when pierced with a fork. Set aside to cook for about 10 minutes, and then slice chicken.
3. Meanwhile, prepare pasta according to package directions. Rinse in cold water to remove sticky starches; drain well and set aside.
4. Prepare Red Pepper Sauce: In a blender or food processor, add all sauce ingredients; blend until very smooth.
5. Dice yellow bell pepper, yellow onion, and garlic, and saute in a pan heated to medium-high with 1 tsp. of olive oil. Saute vegetables for about 5 minutes.
6. Add chicken, pasta, and Red Pepper Sauce to the pan with vegetables, and toss until everything is heated through.
7. Divide evenly, and top with 1.5 oz. of shredded Romano cheese, and garnish with freshly sliced basil.
The recipe directions claim that this serves 2, and that a 2-cup serving is 648 calories. I'll be honest when I say that I actually split this into three servings because it was a little too high, calorie and carb wise, so it will largely depend on how big of a portion you want for your lunch or dinner. Where some people really try to avoid pasta, I recommend this: always make sure you know what one portion looks like, and try to eat your carb-heavy meals early in your day so that you have hours to burn those carbs off.
I also want to point out the importance of recognizing what your food preferences are when you're trying a new recipe, and learning how to modify the recipe so you can fully enjoy it when all of your hard work is done. I know I don't like luke warm food. I also know that I don't like raw vegetables in my hot pasta. So, I changed the recipe. Get creative, step outside of your comfort zone, know what you like and don't like, and learn to modify your recipes according to your nutritional desires. If you're going to try something new, wouldn't you rather fully enjoy it, rather than go in knowing there are certain things you're not going to like right off the bat? So, if you're reading through this recipe, and you decide there's something you want to change, go ahead a mix it up to suit your needs! ENJOY!!!
I hate to waste food! I literally make questionable food choices at least once a week, meaning I'll eat something that's probably past it's shelf life, but most likely won't make me sick, just because I don't want to see it go to waste. Don't try this at home, but I have to openly admit that this happens on the regular...
I bring this up because the Baked Eggplant Chips were a direct result of not wanting to waste the beautiful eggplants that I had snagged at Spring Brook Farm, and at the same time, I had absolutely nothing to go with the burgers that I was making for dinner. My husband is a HUGE fan of chips, or anything crunchy, especially with burgers and sandwiches, so I wanted to make something that was chip-like in consistency to satiate that desire. Eating well is all about substituting healthy foods in place of those that you know are laden with fat and calories. There is always another option, you just have to get creative and find it.
Ingredients:
- 1 small eggplant, thinly sliced
- 3 egg whites
- 1/2 cup Panko breadcrumbs
- Various seasonings (salt, pepper, smoked paprika, Italian blend, etc)
Directions:
Pre-heat oven to 400 degrees
1. Whisk egg whites in a container separate from the bread crumbs.
2. Mix Panko with desired herbs. (It really depends on what herbs you like, dried or fresh, and what you are eating the chips with).
3. Dip each eggplant slice into the egg whites, and then immediately into the bread crumbs, coating each side generously. Place each slice onto a cookie sheet sprayed with non-stick spray.
4. Cook for 15-20 minutes depending on the size of the slices, and the amount on the tray. You should see the Panko brown slightly, but not burn.
5. Remove from oven and let cool for 2-3 minutes before serving.
They may not be potato chips, or french fries, but they are much healthier, make you feel like you're eating something similar, and are darn tasty! If you like a sauce with your chips, try mixing together a little Dijon mustard and Non-fat Greek Yogurt (1 to 2 ratio) with some smoked paprika or black pepper. It will make you feel like you're indulging when you're really just upping your veggie and protein intake! ENJOY!
I'MMMM BAAACCKKK!!! I have been missing for such a lengthy amount of time because I took on Personal Training almost full-time, and I'm learning how to adjust my schedule accordingly. Well, that and I've taken on the third job of the summer: working on my epic tan which requires true dedication and a lot of SPF reapplying. It's not easy...it's really not...
So, with summer in full force, and what is now the THIRD week of ridiculous humidity and heat, I think it's important to post something a little more refreshing, and easy to make, that is still healthy and low-fat. I found this recipe while flipping through Real Simple Magazine by the pool (I told you I've been working hard), and was totally pumped to see how simple and easy it could be to make frozen pops with Greek yogurt. I have seen suggestions and advertisements for many different brands of these in several different health magazines, but I have an issue with spending that much money, and usually there's some sort of preservative in order to keep the product through shipping, and so I have stayed away from purchasing them. This recipe is stupid easy, tastes amazing, and can be modified with any fruit that you prefer, so mix it up and try different flavors and sweeteners!!!
Ingredients:
- 1 cup Non-fat Greek Yogurt
- 1 1/2 cup of Blueberries (strawberries, raspberries, blackberries,etc.)
- 2 tbsp. Honey (agave nectar, maple syrup)
Directions:
1. In one bowl whisk the Greek yogurt and 1 tbsp. of honey.
2. In a separate bowl mash the blueberries and the remaining 1 tbsp. of honey.
3. In a 8-section pop tray layer yogurt, then fruit, and repeat until each each pop is full.
4. Take a toothpick or skewer and mix the Greek yogurt and fruit together to give it a swirled effect.
5. Freeze for at least 3 hours, or up to 3 days.
A word to the wise when removing your pops from the tray. If you aren't eating them all at once, you should run warm water around the single pop you want to remove, and it will pop right out. I originally tried to let them sit out to defrost a little, but then the inside got too warm as well, and the stick kept coming out. Also, if you don't have a pop tray, you can always use small cups and pop sticks to make them. High protein, low-fat, TOTALLY amazing and delicious!
The reality is, that even when we are clean eaters, we can still over eat in calories. This is where I found myself a couple of weeks ago. It's few and far between that I put a ton of crap in my body (minus out my rare visits to Ugly Omelete, where I absolutely must have their Peanut Butter Chip Pancakes), but the reality hit around last Wednesday when I just knew that I had been over eating. I had been using my extreme workouts as an excuse to eat what ever portion of food that I desired, and so, I found myself making very little progress with my appearance, and great gains with my actual cardio. TRAGIC!!! To spend so much time kicking my own butt, and then to over eat so that I see no results on the outside from it. Well, c'est la vie! It's over, it's in the past...
Monday I started a Les Mills Challenge Group with a group of girls, some who I currently working with, some who I knew from other restaurants. Going back to a menu plan was indeed some work. Just setting it up was a mini project, and then teaching others my process was also a learning experience. The first week of the Eat Right for the Fight Nutrition Guide is a 7-Day Metabolic Jump-Start Program where women are suggested to eat around 1200 calories and men 1500.
1200 calories for me was like food prison. With P90X I was eating about 1800-2100 calories a day, never mind that I had been over eating for the last week leading up to that Monday, so you can imagine how that caloric deficit made me feel! But, I went through the meal plan, set up my meals for the week, and made my grocery list based off of that. Little did I know, this was going to not only introduce me to some awesome new recipes, but it was going to finally catapult me out of the 'snack' rut that I had been in for months.
What follows is just a brief glimpse of what I ate during our 7-Day Metabolic Jump-Start Plan. In the end, some meals near the end of the week ended up getting swapped around because I did not want anything to go past it's expiration date.
7-Day Metabolic
Jump-Start Plan
MONDAY
TUESDAY
WEDNESDAY
THURSDAY
FRIDAY
SATURDAY
SUNDAY
BREAKFAST
Rainbow
Scramble
Eggs with
Smoked Turkey
Pro-Oatmeal
Broccoli and
Feta Omelet
Rainbow
Scramble
Eggs with
Smoked Turkey
Pro-Oatmeal
SNACK 1
PB Toast and
Cottage Cheese
Chocolate
Green Tea Smoothie
Turkey and
Cheese on Rice Cake
Chocolate
Green Tea Smoothie
PB Toast and
Cottage Cheese
Chocolate
Green Tea Smoothie
Turkey and
Cheese on Rice Cake
LUNCH
Avocado,
Tempeh, and Almond Salad
Brown Rice
Bowl
Burger and
Salad
Greek Pita
Sandwich
Avocado,
Tempeh, and Almond Salad
Brown Rice
Bowl
Burger and
Salad
SNACK 2
Citrus Berry
Smoothie
Turkey & Cheese of Rice Cake
Citrus Berry
Smoothie
Mediterranean
Eggs
Citrus Berry
Smoothie
Roast Beef
Sandwich
Citrus Berry
Smoothie
DINNER
Southwestern
Chicken Salad
Grilled Tuna
over Mixed Greens
Spicy Tomato
and Lentil Soup
Grilled Steak
and Arugula Salad
Southwestern
Chicken Salad
Grilled Tuna
over Mixed Greens
Spicy Tomato
and Lentil Soup
Calories
1207
1243
1207
1220
1207
1234
1207
Day 1
Proved to be pretty darn delicious. Convenience definitely went out the window basically because I had to learn new recipes, prep, and remember how to measure ingredients and use correct portion sizes, but it definitely refreshed my memory on how I had been way over eating!
Day 2
Again, the food was amazing. I had never really used Shakeology with Greek Yogurt, and truth be told, I didn't love this recipe, but I like that it included the the metabolic boosters of yogurt and green tea, and for that, I'll make sacrifices on my usual recipe. Also, my original scheduled snack wasn't Turkey and Cheese on Rice Cake with Raspberries, but I wasn't in the mood for what I had originally put on, so I substituted. The Tuna salad for dinner was amazing, although I could find Tuna Steak in either of the two grocery stores near me, so I ended up having to use canned tuna. Still, it was an amazing recipe!
Day 3
LUH-UV the Pro-Oatmeal, although I have to say I was a bit shocked to see just how little the portion size was for it. I mean, I served it with egg whites and fruit, but still, it didn't even fill the 1 cup ramekin that I had it in, and that was just disappointing! However, the burger was AMAZING, and the tomato and lentil soup was something I couldn't wait to have again.
Day 4
This was probably one of my favorite days of meal plans. I loved that I could have Feta Cheese, in fact I love all cheese, so any cheese is better than no cheese. Also, I cannot believe how much I like the hard boiled egg whites with the hummus in place of the yolk. It tasted so much like deviled eggs, that I'm pretty sure it tricked my brain into thinking it actually was deviled eggs. I was bummed when I realized later in the day that I forgot to put Feta Cheese on my pita. It was still pretty delicious, but I was bummed nonetheless! And steak on my salad, well, I am a red meat lover, so that was a nice little treat.
Day 5 repeated Day 1's meal plan, and Day 7 repeated Day 3's meal plan, so there were no big surprises there. Day 6 did have a tiny bit of a change up in that I made the Roast Beef Sandwich (I wish I had done that earlier in the week, it was delicious), and the Grilled Tuna over Mixed Greens got a bit of a remix because of what we had left in the fridge.
Day 6
The Roast Beef Sandwich was amazing, and I ended up modifying the Tuna Salad again because I couldn't find tuna steak, and I put an over easy egg on the salad because I didn't have any hard boiled. I also used the remainder of some canned tomatoes because I didn't have any fresh tomatoes, and I didn't want to waste what I had already opened.
I do want to briefly touch on how I felt during this 7-Day Metabolic Jump-Start Plan because I think it's important for other people to realize that this journey is not easy, even for someone who has made the clean eating jump already, and knows how to organize and set up a menu plan, and shopping list.
The first couple days of this Challenge we extremely hard. The workouts weren't nearly as intense as Asylum, which I had just finished, but the lack of calories really did a number on my energy levels. I know that the second day at work was a real challenge, not only for myself, but for the other girls who were working that night as well. We were all hungry, we were all tired, and we were all cranky. When your body is used to a certain number of calories, and you introduce a new and different workout, you're going to see a reaction in how you function and how you sleep. FACT. I found that my Coaching really took place during these first few days when we were all getting in the swing of things, and were struggling to adjust our daily caloric intake.
Just like my workouts, I approached this caloric deficit day-by-day, crossing off each day on my calendar. Was I hungry the first couple of days? ABSOLUTELY, but I trucked on until I was feeling amazing by day four. I had adjusted to the calories that I was taking in, I was in a rhythm with my meal planning, and I was enjoying being introduced to new recipes. I had totally fallen into a rut with my clean eating where I was eating the same snack all of the time, and preparing the same meals all of the time because I was getting lazy, and not paying attention to what my body needed.
Below you will find a video on how to transition from the 7-Day Metabolic Jump-Start Plan to the day-to-day menu planning for the remainder of the program. So, if you're someone who is interested in the program, and is curious what the meal plans are like, or you're someone who's currently doing the program, and needs help moving forward, definitely check it out!
Stay tuned throughout the next couple months, as this journey continues for myself, and my Challenge Group girls. Who knows, maybe I can get one of them to share their experience with changing over to a new clean eating lifestyle!
Until then, KEEP STRONG. KEEP MOVING. And, KEEP PUSHING PLAY!!!
As I sit here waiting for my Personal Mini Quiches to be ready for this mornings breakfast, it seems only appropriate to work on my next post which features the spaghetti squash that I randomly picked up when I was grocery shopping last week. I've been following a woman on Instagram who's screen name is 100daysofcleaneating, and it's a daily catalog of her foods and workouts. Some days I find what she's doing interesting, some days I glide over her post with a quick glance, and a whatever attitude. Over the last week or so, she has either mentioned or featured spaghetti squash in her posts at least a couple times, and clearly because of this, my subconscious felt the need for some as well.
I'm a squash lover anyway, and I've definitely cooked with the vegetable before, but to be honest, it's not something that makes it into my weekly dinner regimen, and now I'm asking myself why. In discussing it last night with my BFF Jackie, I was saying how much I enjoy cooking dishes that allow me to walk away, do some prep, and a quick saute, toss it all together, and then pretend that I did a fair amount of work. This is totally one of those dishes. Keep in mind that outside of the squash, the vegetables that went into this dish ended up in here basically because they are what I had in my fridge, not because they are what I had planned on cooking with the squash itself. I'm lucky enough to be at a point in my clean eating cooking that I can pick up a handful of random things, see what I'm left with near the end of my week, and then throw something together. If you aren't there yet, just keeping researching, testing, and eating clean, and at some point it'll all just click, and you'll be able to do the same.
Ingredients:
- 1 Spaghetti Squash
- 1/2 Medium Yellow Onion, diced
- 1 c. Mushrooms (any variety would be fine)
- 1/2 c. Peas (fresh or frozen)
- 2 Cloves Garlic, chopped
- 2 tsp. Olive Oil, divided
- Salt, to taste
- Pepper, to taste
- Smoked Paprika, to taste
- 1 tbsp. Shredded Parmesan, divided
Directions:
Preheat oven to 375.
1. Cut spaghetti squash in half from stem to stem, and hollow out seeds. Rub 1 tsp. of olive oil between the two halves and season with salt and smoked paprika to taste. Turn the squash halved sides down on the baking sheet (I lined mine with parchment paper for easy clean up) and bake for 35-45 minutes, or until squash is soft. Remove from oven and let cool for 10 minutes.
2. Meanwhile, place 1 tsp. of Olive Oil in a medium saute pan on medium heat. Add onion, season with salt and pepper to taste, and saute until translucent, about 3-5 minutes. Add mushrooms and cook for 3 minutes, and then add peas (thawed if frozen) and garlic and cook an additional 3 minutes.
3. Reduce heat to low, and take one of your squash halves, holding the skin in your palm carefully with a paper towel or towel, and with a fork shred the inside of the squash from top to bottom until all of the 'meat' of the squash is in the saute pan. Repeat with the other half of the squash. Toss all ingredients together. Top each serving with 1/2 tbsp. of shredded Parmesan cheese.
I split this dish into two servings, however it may have been possible to break it into three depending on what serving size or calorie portion you are looking for. If you are trying to avoid wheat products, or pasta in general, you'll find that this is a great substitution for those due to the texture of the squash. Also, as I stated before, you are able to add whatever vegetables or meat that you would like to the dish, so feel free to modify it with ingredients that you prefer, or that you have hanging around at the end of your grocery week to ensure that you don't waste any food in your fridge.
For those of you who aren't in our Shakeology cult (which you should be because it will change your life forever), you must realize that we drink this shake daily, and using any nutritional supplement daily can get a tad bit boring. That's not to say that the recipes that we get sent every month aren't unbelievable, and there are a multitude of recipes on the web for people to switch it up and make it new and exciting, and that's part of the reason that I'm here. I used to use protein powder in a lot of different recipes, however as my clean eating evolved, so did my understanding about what was in most protein powders, and so I eliminated it from my diet. However, when I started on Shakeology a few months back, I realized that there was a whole new world of opportunities for those recipes out there that do include protein powder, so I have taken it as my personal mission to find as many ways possible to incorporate this super dense, super-food meal supplement in my life in a variety of forms.
Not all of these recipes with be the 'healthiest' of snacks or meals. There is, indeed, a difference between this recipe, and a recipe for a shake or protein pancake. Nonetheless, I think it's important that we have a variety of avenues for any food to remain a constant in our diet, and so that is what I will achieve. Today's recipe admittedly has a large amount of sugar, albeit natural sugars, they are still sugars. Therefore, you shouldn't make a pan of this fudge, sit in front of your TV, and stuff your face with the entire pan. But, on those days when you're rummaging through your pantry or fridge looking for something to satiate that sweet chocolate desire, this will do just that. And rather than it being a Milky Way or Snickers, it will be something that has tons of antioxidants, nutrients, and proteins, especially when you add in all the nuts and berries that are combined into the fudge. This recipe was modified from Averie Cooks, and looked so simple and delicious that I just couldn't help trying it out with Shakeology. So here we go!
Ingredients:
- 3/4 c. honey (or brown rice syrup, agave nectar, maple syrup)
- 3/4 c. peanut butter (I used Teddy's All Natural Smooth)
- 1 tsp. vanilla extract
- 1/2 c. Chocolate Shakeology
- 1/3 c. diced dried cranberries (or diced raisin, dried blueberries, or dried fruit of your liking)
- 1/3 c. chopped almonds (or other nuts, or omit)
- 8x8 disposable aluminum baking pan sprayed with Pam
Note: This is a fast moving recipe so have everything ready to go before you begin and work quickly through the steps.
Directions:
1. Pour the honey into a medium-sized sauce pan and heat over medium-high heat until it almost begins to boil; turn of heat.
2. Add the peanut better and stir until smooth. Add the vanilla extract and stir, using caution as it could bubble up a bit.
3. Add the protein powder and stir, taking care to work quickly because batter will get increasingly stiff as time elapses. Quickly fold in the diced fruit and peanuts.
4. Spread over the bottom of the 8x8 pan and place in freezer for a minimum of 90 minutes. Remove from the freezer and slice fudge into desired size.
I would suggest keeping the fudge either in the freezer, and taking it out 5-10 minutes before you want to eat it, or in the fridge. Otherwise, at room temperature, it may get a little bit soft. This one's a keeper for sure, so ENJOY!!!
I'll be honest, I gank recipes all the time. Yup, I steal them, and then I make them, and then I share them with you. But, let's be honest, much like reading a customer review on Amazon, wouldn't you rather have someone else learn first that all the work you're putting into a soup is worth it, than spend an hour doing it yourself only to find out it was mediocre? I'm here to serve you people, and you're welcome!
I stole this particular recipe from The Best of Clean Eating 3, which my husband bought me for Christmas. I had been so busy with getting my Beachbody business up and running that I hadn't had much time to jump into the books, but I think he and I are both getting sick of our baked salmon and asparagus, so I'm starting to attack these bad Larry's like a beast. I also think that the desire to make this came from the fact that my restaurant, Gibbet Hill Grill, switched our seasonal soup from a Butternut Squash to a Potato and Vermont Cheddar, and this left me depressed and craving the old soup. Much like a 10 year child I was like, "Fine, take it off the menu, but I'm gonna go home and make my own! AND, I'll make it healthier! SO THERE!"
So, that's what I did!
Ingredients:
- 2 firm pears (such as Anjou), peeled, cored and chopped into 1-inch cubes
- 1 small butternut squash, peeled, seeded and chopped into 1-inch chunks
- 3 tsp olive oil, divided
- 1 small yellow onion, finely diced
- pinch each sea salt and fresh ground black pepper
- 3 c. low-sodium vegetable broth
- 1/4 c. fat-free plain yogurt for garnish (optional)
- pinch of nutmeg for garnish (optional)
Directions:
1. Preheat oven to 400 degrees. In a roasting pan, combine pears and squash. Drizzle with 1 1/2 tsp oil, toss to coat, then spread out to cover bottom of pan, allowing for some overlap. Roast in oven, uncovered, until squash begins to brown and soften, about 20-30 minutes. Remove from oven and set aside.
2. Meanwhile, in a large saucepan, heat remaining 1 1/2 tsp oil on medium. Add onion, sprinkle with salt and pepper. Saute until onion is softened and golden in color, 3-4 minutes. Add pear-squash mixture and broth and bring to a boil. Reduce heat to low and simmer for 15 minutes.
3. Using a hand blender or upright blender, puree mixture until smooth, about 45 to 60 seconds. (NOTE: If using an upright blender, work in small, cooled batches to avoid scalding. Then return to saucepan on low until reheated.) Garnish each serving with yogurt, and nutmeg if desired.